Hardwood Floor Refinishing NJ is a time-consuming process. It typically takes four to five days to refinish one room. The floors must be cleared of furniture and other objects. Before staining, the wood must be water-popped. This prepares the grain of the wood to accept the stain and improves the overall results.
Hardwood floors are known for their durability, which is a major part of why they’re so popular in homes. However, they can become damaged over time from normal use or just ageing. Damaged wood floors may need a thorough sanding and refinishing. When this happens, it is essential to hire a professional who can restore your hardwood floors to their former glory.
When refinishing your hardwood floors, you’ll need to take a few precautions to protect the rest of your home from sawdust and dust. First, clear the room that you are working on of all furniture and decorations. You should also cover any air vents with plastic sheeting to prevent escaping dust. Finally, apply painters tape to any areas where your sanding equipment might be touching fixtures or other surfaces.
Before you begin sanding, read the manufacturer’s instructions for your drum sander and sanding disks to ensure that you are using the correct equipment and following safety protocols. In general, you should sand with the grain of the wood, but when removing deep scratches and stains, it is often necessary to angle across the grain to remove stubborn material. After you have finished sanding, vacuum the floor thoroughly to remove any leftover debris or grit. This is a crucial step, since any dirt or grit left behind will scratch the newly refinished surface.
If your floors are severely scratched, you can repair them by filling the holes with wood putty and then sanding them smooth. If you don’t have wood putty on hand, you can also try a simple wood glue. It is important to let the filler dry completely before sanding again.
You should choose a penetrating stain for your hardwood floors, as this will provide the best results. If you’re re-staining your floors, make sure that you use a stain that matches the color of the existing stain. Be aware that different types of wood react to stains differently, so it is important to test a small amount of the stain on a corner of your floor before you begin.
Filling
Gaps in hardwood floors can be quite frustrating. They can make your floor look sloppy and unfinished. They can also let in drafts and dirt, making them uncomfortable to walk on. They are almost inevitable in older homes, but they can be repaired during a hardwood floor refinishing project.
While sanding your hardwood, you may need to fill in a few gaps, nail holes and voids. This step is essential to a smooth finish and a nice-looking hardwood floor. There are many different types of fillers that you can use. Most are pre-mixed and come in a variety of colors to match your hardwood. They also do a good job of accepting traditional stain. If you need to do a lot of filling, it is best to do this when the weather is warm and humid. This will help prevent the filler from cracking or shrinking as the wood expands when it gets cold again.
If you’re looking for a quick and easy way to fill your hardwood gaps, try using strips of wood or rope. First, cut a piece of wood to the size of the gap you want to fix. Next, apply wood glue to both sides of the strip. Finally, use a hammer or other type of mallet to tap the strip into the gap, but be careful not to damage the surrounding boards or finish. Once the glue has dried, sand the wood to remove any high spots, then stain the filler to match your flooring.
Another important part of the refinishing process is addressing any water damage to the wood. It is important to do this before applying any stain or finish to the wood, as water can damage the floor and lead to future problems. If you’re not familiar with repairing water damage to hardwood, it is recommended that you consult a professional.
Once the gap filling and board repair are complete, it’s time to seal your floors. This will protect them from stains and water, and it will give them an extra layer of durability that will help them last for many years. There are a variety of sealers available, but it’s best to go with a polyurethane or an acid-cured finish.
Staining
When it comes to refinishing hardwood floors, staining is the final step that brings all of your hard work together into one beautiful and finished product. Staining will add a new color to your floor, and can bring out the beauty of each individual wood grain. It can also accent the natural patina of your floor and give it a cozier, more inviting look to any room. However, staining can be a difficult process to take on yourself, and requires the right knowledge and equipment.
Before you can begin staining, it is important to prepare the area by vacuuming and dusting thoroughly. This will ensure that your floors are free from any dirt or specks of debris that could mar the finish. You will also need to make sure that there is proper ventilation in the room, as the staining process can release a strong chemical smell.
After vacuuming and dusting, you will need to wipe down the floor again with a damp cloth. This will remove any remaining traces of sanding dust, and help the stain to adhere to the surface. Once the floor is dry, it is ready for staining.
When staining your hardwood floors, it is important to follow the directions on the label. It is also important to keep in mind that different woods react differently to stains. You will need to test a small patch of the floor with your desired stain before you commit to using it on the entire floor.
Once the stain is applied, you will need to let it dry for a few hours. Once it is dry, you will need to sand the surface with fine grit sandpaper (220 grit) to smooth any rough spots and to prepare the floor for a protective finish.
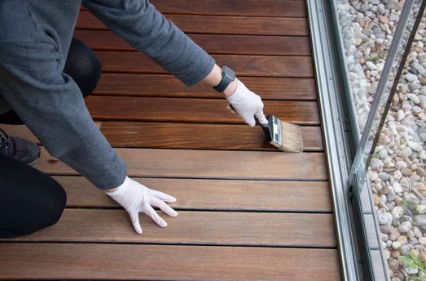
To protect the finished stain, it is recommended that you apply a high-density polyurethane sealer. Using a lambswool applicator, start at the corner of the room farthest from the door and work your way around the floor, keeping a wet edge by wiping away excess stain as you go. For the corners and the area where the floor meets the baseboard, a brush can be used to get into tight spaces.
Finishing
Refinishing hardwood floors is a labor intensive project. However, it’s one of the best ways to protect your investment and keep your wood floors looking beautiful. It’s also a much less expensive option than replacing your flooring or covering it with a carpet. Refinishing is a process that’s most effective when performed regularly, so make it a priority to refinish your floors every few years to ensure they last as long as possible.
To prepare the floor for refinishing, remove all furniture and dust any baseboards and vents. Clear the room of any items that could get in the way of your sanding or staining process, and close windows and doors to contain the dust. After sanding, use a vacuum cleaner and/or broom to get rid of any lingering dust particles. Next, clean the entire floor with a cleaner such as a TSP substitute or hot water and bleach. Once the floor is completely dry, you’re ready to start the refinishing process.
Before you begin refinishing, be sure to read the instructions on the finish tin carefully. This is especially important if you’re going to be using a chemical stripper. It is also a good idea to practice using the sander on a few pieces of scrap wood before getting started in your home. Doing so will help you understand how the machine works and how to get the most out of it.
Sanding is one of the most challenging parts of refinishing. It’s vital to follow the directions on your drum sander closely so you don’t damage your floors. It’s also a good idea to wear protective eyewear and earplugs during this step, as well as a face mask rated for fumes.
After sanding, you’ll need to apply a stain if you want your floors to have a certain color. Once again, be sure to follow the instructions on the stain tin carefully and apply thin coats along the grain. If you’re using an oil-based stain, you can try adding a few additives to reduce the VOC (volatile organic compounds) content.
Once the stain is dry, you’re ready to refinish your hardwood floors with polyurethane. Be sure to follow the application instructions on the tin, and allow each coat to dry completely before moving your furniture back into the room. Once you’ve applied a total of three coats, your floor will be finished and ready for everyday use!