Business Services

Drywall Repair – How to Get the Job Done Right

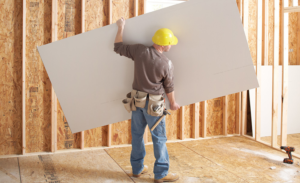
Drywall Repair Las Vegas is a fairly easy do-it-yourself project. However, it does take time and practice to get the job right.

Small holes, dings, and minor cracks can be easily fixed using spackle, a putty knife, sandpaper, and joint compound. This is one of the most satisfying home improvement projects!

No matter how careful you are in your home, it’s inevitable that you will encounter some holes and dents in the walls. The good news is that you can fix almost any hole with a few quick and easy steps. This is especially true of tiny screw and nail holes, which are the most common types of drywall damage. You can use a wide putty knife to fill these with spackling compound or wall joint compound, and then sand the area smooth before painting it.

First, make sure that the hole is completely dry by touching it with your finger. If it still feels rough, you need to sand the surface again. Once the area is smooth, wipe away any sanding dust with a damp paper towel.

If you are concerned about the color of your repaired drywall, you can bring paint chips from your wall to a hardware store for a closer match. Otherwise, you can simply use a paint that is slightly lighter than your existing wall color.

Before you begin patching, turn off the electricity to the affected area if it’s not already turned off. This will prevent any electrical or plumbing issues from popping up while you’re working on the project. Also, be sure to check that all wiring and pipes are securely anchored to the wall before you cut into it.

A drywall patch kit is an easy way to fix small holes and dents. This kit typically includes a drywall patch, tape, sanding tool, and matching paint. Using the patch will save you from having to cut out and replace a larger section of drywall.

If the drywall patch is not a perfect fit in the hole, you will need to add some bridging material. This is easy to do with a utility knife and can be done while you’re working on the rest of the patch.

For dents and holes that are near the edge of your wall, you can use self-adhering mesh tape to cover the edges of the hole. You can then apply spackling or wall joint compound over the mesh tape and sand smooth before painting.

Small holes, dents and dings can be easily repaired by using a patch kit for drywall. However, when the hole is larger than a dollar coin, repairing it becomes more of a project. However, even novice DIYers can tackle large drywall repairs with some care and patience.

Before tackling any drywall repair, make sure to clean the area by removing loose drywall and clearing away any chipped paint. Then sand the surface to smooth it. This is especially important if the hole was caused by a fastener or power screw.

The next step is to square off the hole if needed. This can be done with a utility knife or small saw blade. If you are using a saw, it is recommended that you use a straight edge to guide the saw and ensure that all cuts are even. Also, remember to be careful not to cut any electrical wires in the wall.

Once the area is cleaned, it’s time to prepare for the drywall patch. A drywall patch can be purchased at any hardware store and is typically easy to install:

  1. Tape all the seams around the opening.
  2. Using a drywall knife, spread a layer of joint compound over the tape. Let it dry overnight.
  3. Sand the dried compound until it is smooth and blends in with the rest of the wall.

When dealing with larger holes, you’ll need to brace the wall. This can be done by inserting a piece of wood into the hole on the left and right side, or by placing a stud in the top and bottom of the wall in the center of the hole. This will help support the drywall patch and keep it from becoming damaged in the future.

Once the patch and seams are finished, it’s time to sand and apply a coat of primer to match the rest of the wall. Then, once the primer is dry, you can finish it with your choice of color. If the wall is already textured, you can skip this step.

Cracks in drywall are usually an indication of something that needs to be repaired. The type of crack you have will tell you a lot about what is happening and whether you can fix it yourself or it’s time to call in the professionals.

Fine, straight cracks are often the result of normal house settling that can be easily remedied by re-taping the joints or seams in your walls. It is important to check on these cracks after the repair and keep an eye out for them reoccurring, as this is an early warning sign that there may be structural problems in your home that need immediate attention.

Wall and ceiling cracks may also be the result of a lack of proper support in your foundation or structural elements. It is important to consult with a professional to ensure that your foundation is stable and that any cracking you have in your drywall is not due to structural problems.

Another common cause of drywall cracks is changes in humidity. Drywall is very sensitive to changes in humidity, which can lead to expanding and contracting that causes cracks in the drywall. Keeping humidity levels consistent can prevent this problem from occurring.

In addition to humidity, cracks can also be caused by a change in temperature or by a shift in the weight on a building’s structural components. For example, if a family member moves in or out of a home, it can cause the house to settle differently and can cause cracking in drywall.

If you have a crack in your wall or ceiling that is due to a change in humidity, you can patch it by adding some self-adhering mesh tape to the area where the crack is. This will help to strengthen the crack, reduce shifting and make it less noticeable. Next, cover the tape with a layer of joint compound and smooth it out with a putty knife. After the compound is dry, you can feather the edges to make the repairs blend in with the rest of the wall or ceiling.

When you’re making repairs to textured walls and ceilings, it’s important that you match the texture so that the patch isn’t standing out. This is especially true for knockdown texture, which is more likely to show up as an uneven surface than other types of texture.

If you know the type of texture that was used when your wall or ceiling was originally applied, then matching it will be easier. If you’re not sure, it may take some time to experiment with different tools and techniques on scrap pieces of wallboard until you find a match.

There are four main types of drywall textures: orange peel, skip trowel, knockdown, and sand. Each has a unique look and requires slightly different application methods. If you have a lot of experience, then you may be able to recognize the type of texture just by looking at it. However, it’s best to apply a small patch and examine it carefully before committing to a full repair.

Regardless of the type of texture you want to use, you should always water down your mud mixture. This will help it flow smoothly across the surface, whether you’re using a hand tool or a sprayer. The amount of water that you add will depend on the effect that you’re trying to achieve, so be sure to experiment on a few test areas before applying it to your repair.

Once your mud is at the right consistency, apply it to your repaired area. Make sure to apply it evenly, feathering out the edges for a seamless transition. Once the mud is dry, you can sand it lightly to remove any high spots.

After you’ve sanded your repaired area, you can apply a coat of joint compound to the surface. When the compound is dry, you can retexture it if needed. Be sure to prime the patch and a few inches beyond it to prevent moisture damage and discoloration. Then, you can reapply your desired drywall texture and enjoy your newly repaired and retextured walls. When you’re ready for a fresh coat of paint, all that’s left to do is to sand the surface again until it’s smooth and prepared for painting.

Business Services

How Can Lip Fillers Enhance Your Lips?

Lip Fillers San Diego are typically injected with hyaluronic acid, which is naturally produced in your body. The procedure is quick and convenient, typically taking less than 30 minutes.

The most obvious benefit of lip fillers is that they make your lips look fuller and more shapely. This enhances symmetry and proportionality in the face, which can boost confidence levels.

  1. Enhance Your Natural Lip Shape

Lip fillers can enhance the natural shape of your lips by adding volume and defining certain areas. This cosmetic procedure can also improve the appearance of fine lines and wrinkles around your mouth.

Lip filler injections are performed with a gel-like substance that contains hyaluronic acid. This naturally occurring substance attracts water molecules to add volume and plump your skin. It is used in many products including Juvederm and Restylane lip fillers. You will want to choose a trained and experienced professional for your lip filler treatment to minimize risk of complications or unnatural results. Heather, our Aesthetic RN is highly skilled in the art of lip fillers and has injected hundreds, if not thousands, of happy clients!

When selecting a practitioner, ask to see their portfolio of before and after filler photos. Then, make sure they are board-certified and have extensive experience in lip augmentation using FDA approved fillers.

Your initial appointment will include a comprehensive consultation with Heather to discuss your goals and expectations. She will also recommend the best lip filler shape for your face.

The ideal lips contain proportional features such as a pronounced Cupid’s bow, defined vermilion border, and fullness concentrated towards the center of the lips. Lip fillers can be applied to both the upper and lower lips to create a more defined, attractive, and balanced look.

When selecting the right lip filler shape, keep in mind that your desired results may not be immediately evident as the lips will initially appear somewhat swollen. You will need to attend regular follow-up appointments for touch ups. For optimal results, it is recommended to avoid consuming alcohol and smoking for 48 hours prior to your treatment to minimize swelling and bruising. It is also important to maintain hydrated lips by applying a moisturizing lip balm daily.

  1. Add Volume to Your Lips

Lip fillers are a great way to add volume to your lips, making them fuller and plumper. They can also be used to soften lines and wrinkles around the mouth, bringing symmetry and balance to your entire face. Many of the most popular dermal fillers for the lips are made from hyaluronic acid, which works by attracting nearby moisture to plump up your lips. The results from a lip filler treatment will last for six months before they need to be replaced.

A common request from clients is to add lip volume to create a symmetrical appearance. This can be especially important if you have an asymmetrical jawline or chin, as larger lips can help balance these areas of your face. However, it is important to find an injector who can add enough volume to bring a natural-looking result without overdoing it.

When it comes to adding volume, an experienced injector will be able to assess how much lip filler is needed for each zone of your lips. They will then inject a precise amount to create the look you want. It is generally best to slowly ease into fuller lips rather than jumping in headfirst, as too much filler can create duck lips and other unattractive effects.

Whether you’re looking to accentuate the corners of your lips, define your lip border or simply make them softer and redder, lip fillers can help you achieve the look you’ve always wanted. You can even use them to soften smoker’s lines and other fine lines and wrinkles that tend to appear around the mouth as you age. This makes them an ideal corrective treatment for clients who have thin lips due to genetics or aging.

  1. Enhance Your Lip Lines

If your lips are thin and wrinkly, lip fillers can add a subtle boost of volume while smoothing lines. This can give your face more structure and help turn back the clock.

The best fillers for enhancing your lip lines are soft hyaluronic acid fillers, says Dr. Sunder, referring to the Juvederm and Restylane lines as the gold standard. Her favorites are Volbella (Juvederm), Defyne (Allergan) and Silk (Galderma).

With this type of filler, your doctor will mark the areas to be injected and use a small needle to inject the filler into your lips. A topical or local anesthetic is often used to numb the area and ice may be applied to reduce swelling. Once the filler is injected, it immediately creates support for your skin, which minimizes the appearance of fine lines and wrinkles. The hyaluronic acid in the filler also triggers your skin to produce more natural collagen, which further enhances the results of your lip fillers.

Lip fillers can also address the fine vertical lines that form around your mouth over time, which blur and make it hard for lipstick to stay in place. They can also redefine your Cupid’s bow, the attractive heart-shaped crease at the top of some people’s lips that is a hallmark of beauty for many iconic women, including Marilyn Monroe and Taylor Swift.

Most experts Allure interviewed say they can perform lip fillers and consult with clients about their goals during the same visit, though some still prefer a two-appointment process. Some doctors will even perform other injectables, such as BOTOX Cosmetic or DAXXIFY for the neck or jawline or KYBELLA for the submental (“double chin”) area, during the same appointment as lip fillers to provide a more comprehensive enhancement.

  1. Define Your Lip Border

One of the most subtle yet impactful ways lip fillers can improve a pout is by refining the border of the lips. This adds structure and bolsters the line to help lipstick maintain a crisp, defined appearance, corrects blurring, and improves a “sad” lip look.

This technique uses a soft, fluid filler like Restylane Kysse to inject tiny microdroplets of the filler along your lip border, which defines and accentuates the line between the red lips and the skin of your normal mouth. This not only creates a sharper demarcation between your red lips and the surrounding skin, but it also helps even out asymmetry in your lips for a more symmetrical, youthful appearance.

The Lip Corner Lift is a newer technique that addresses the outer corners of your lips to avert drooping, which can make your face look older. The corner augmentation treatment involves placing filler underneath the skin just below your lips to contour and lift them. This can also reverse a downward tilt of the corners, improving a “sad” or aged lip appearance, and is done on an outpatient basis with local anesthesia.

A well-trained practitioner will not only be able to guide you toward a more balanced, harmonious appearance that reflects the unique beauty of your facial anatomy, but they will also take into account the potential for the filler to migrate beyond the intended areas. This can cause a heavy, unnatural appearance in the philtrum and can even lead to damage of blood vessels and tissue necrosis (which is actually quite rare but still worth noting). Many of the experts Allure spoke with prefer hyaluronic acid-based fillers for these delicate soft-tissue areas because they are natural-looking and easily reversible if needed.

  1. Enhance Your Profile

Lip fillers can be used to enhance your lip contours and redefine your lips’ shape for a more youthful and symmetrical appearance when viewed from the side. When paired with a surgical procedure such as a lip lift, the results can be dramatic. The Teosyal line of dermal fillers is specially designed for enhancing the lips with injections of hyaluronic acid gel that replenishes volume, smoothes lines and wrinkles, and enhances lip shape and definition.

A light hand with injectables is key to the artistry of lip enhancement. When you choose a highly trained, experienced injector, the results will be natural and balanced. Lip filler treatments require minimal downtime and are a great option for those who want to avoid the permanent effects of surgery.

The right amount of lip filler can transform your face by giving you the appearance of a more youthful and alluring pout. However, too much lip filler can make your lips look overfilled and distorted. To avoid this, it is important to see an experienced injector who can judge how much filler your lips need based on the size of your smile, the shape of your face, and other aesthetic features.

One of the most common myths about lip fillers is that they create big, ballooning lips. While some people can pull this look off, many patients prefer a subtle, natural-looking enhancement. It is also important to remember that lip fillers are not permanent and will need to be topped up at regular intervals to maintain their effect. If you are happy with your results, it is recommended to come in for a touch up every 4-6 months.